After waiting for a few months, I finally upgraded my main storage server from TureNAS core to TureNAS Scale during my server upgrade. Now I am asking myself, do I really need this upgrade?

After waiting for a few months, I finally upgraded my main storage server from TureNAS core to TureNAS Scale during my server upgrade. Now I am asking myself, do I really need this upgrade?

Yesterday, I was check my home network regularly and see a message of possible to upgrade my Ubiquity Cloud Key to version 6. But unfortunately lost all configuration after the upgrade.

I bought a Mikrotik CCR1009-8G-1S-1S+ several years ago and use as my main router at home. It was relatively quiet with lower load when put on a shelf, but after I move to the new apartment and put it into a network cabinet, the noise was much higher especially in hot summer. So I decided to replace the factory fan with something quilter.
It seems there is something wrong with my Plex Media Server today, I can not see any new item after the library scan, although logs show plex do have access to those files in the console.

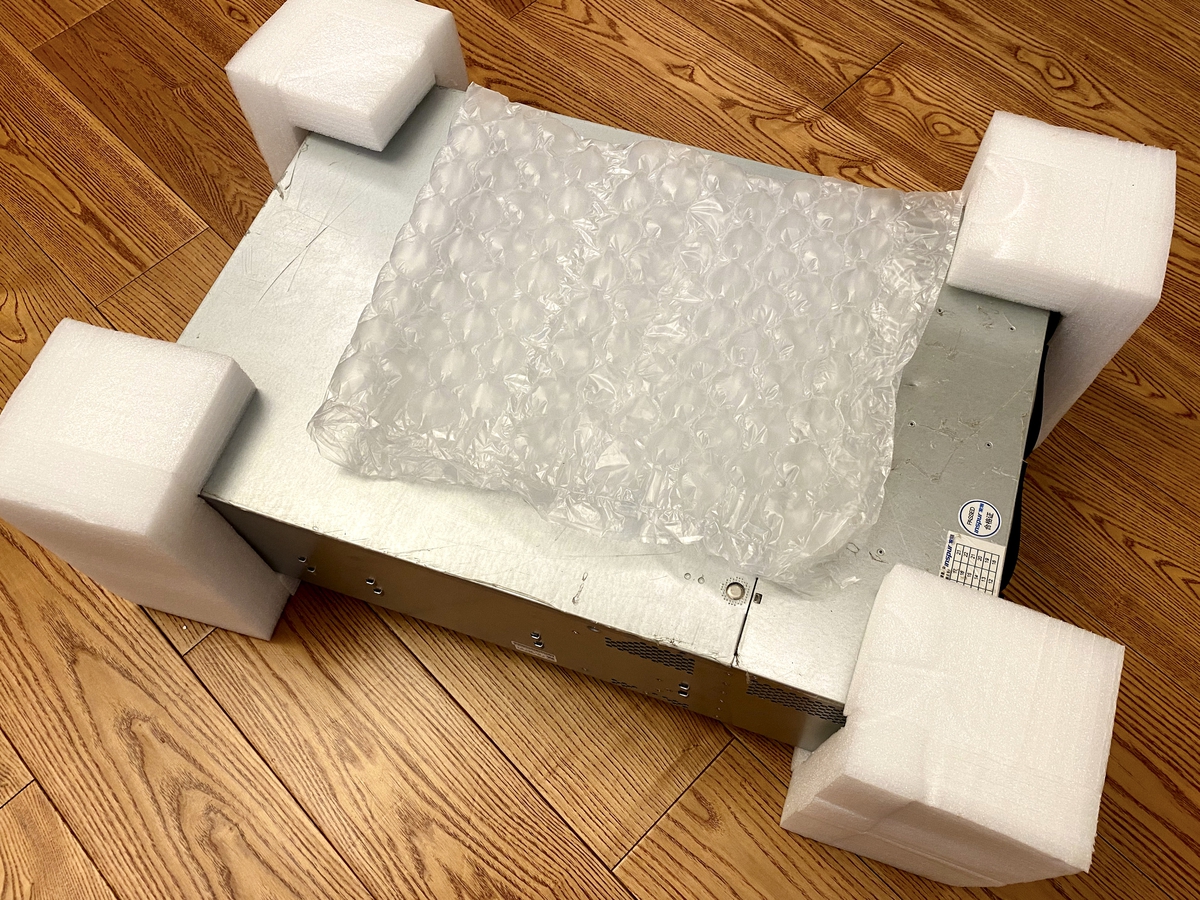
Today I get another Supermicro SC846 4U Chassis for my Homelab.
Two months ago, one my friend wanted a dual-CPU motherboard for an old workstation setup and asking for my opinion. I replied if you need a second-hand server board it’s better to buy a barebone with a chassis to avoid repaired parts. So we bought a chassis with a Supermicro X9DRI-LN4F+ motherboard delivery to my friend’s place, and he keeps the motherboard, and I take the chassis. The system arrived in one week, but I was not going to take my chassis due to Coronavirus.
Finally today I clean up some space on my rack and pick up this 20kg metal box from my friend’s storage.
This chassis is a Supermicro SC846 4U chassis OEM for Inspur – Chinese server manufacture, as the I bought this server in China. Besides there are several Chinese stickers on the outside of the box and Supermicro logo is replaced with Inspur logo on right server handle, there are no different to any Supermicro chassis. There are Supermicro marker and part number everywhere inside.
Chassis
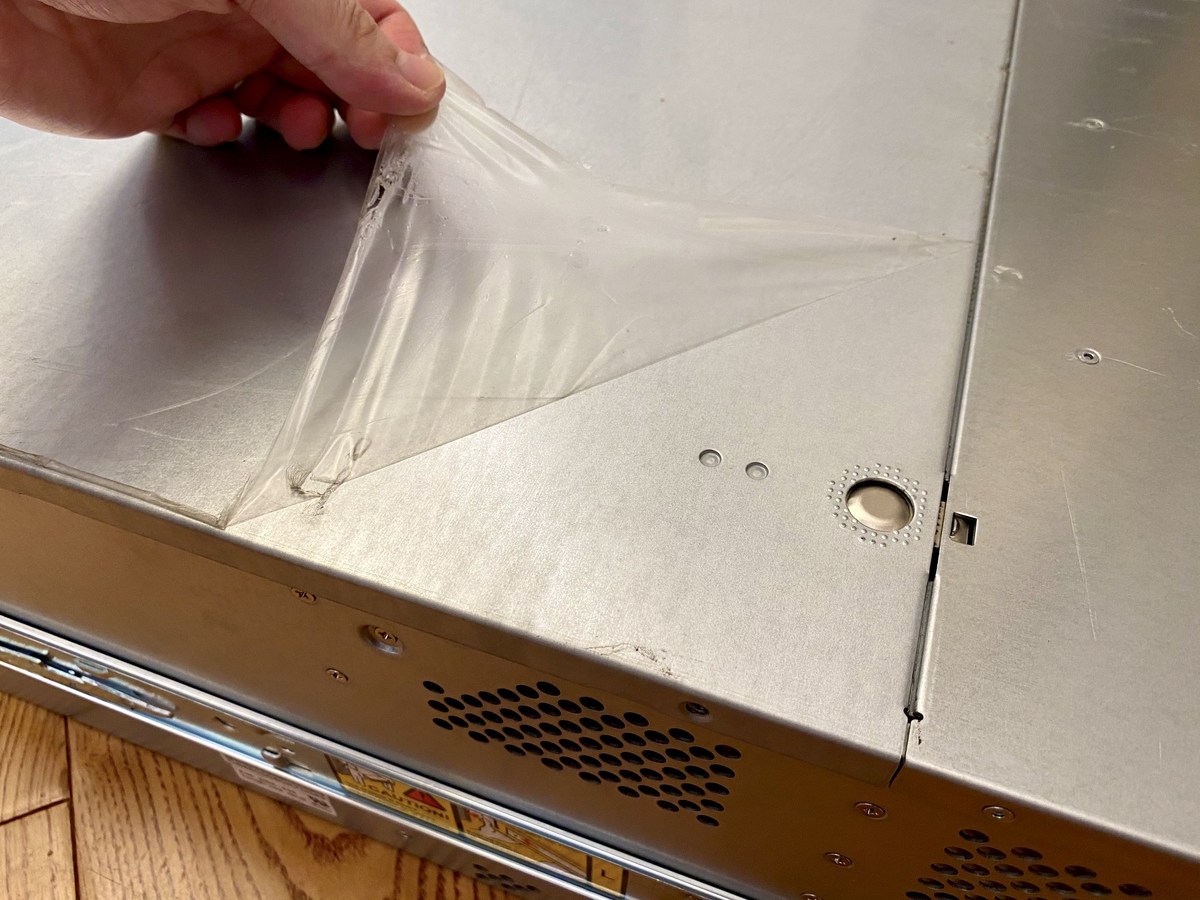
The first look is the chassis is in excellent conditions. The top of HDD cage, chassis door and chassis handle was protected by original plastic film, all surface is shine without rust or dust. Beside of reasonable marks, there is one visible dent on top of HDD cage.
Fans
The recent model of CSE-846 may come with three Nidec 7000 rpm fan (FAN-0127L4) with 72.5 CFM and 53.5 dBA in the middle and two Sanyo Denki 6700 rpm fan (FAN-0125L4) with 59.6 CFM and 47 dBA at the exhaust, but my configuration have five Sanyo San Ace 80 6700 rpm fans. Those fans are very loud at any configurable speed and not suitable in any home office environment, so I will replace them with much quieter Noctua fans.

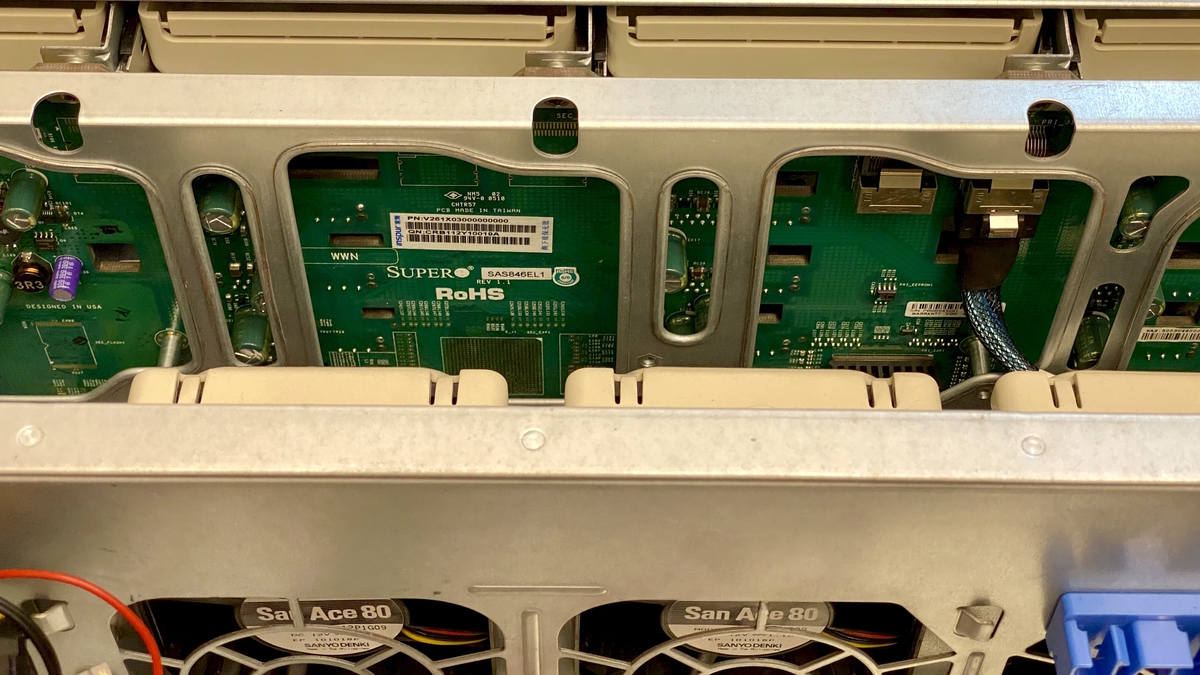
Backplane
My chassis comes with a SAS846EL1 backplane, which is a very old SAS 1 backplane with only 12Gbit/s (4 lines x 3 Gbit/s) uplink to the controller, which will be probably replaced by direct plane or SAS 2 plane. I have summarised all backplane for SC846 chassis in this post.
Drive Tray
There are 24 Gen 5.5 hot-swap 3.5 hard drive trays (MCP-220-00075-0B) come with this chassis. As always Supermicro drive tray is ugly, I don’t like the wave design, and the small tray handle makes it difficult to pull drive out. The Gen 6.5 tray (MCP-220-00094-0B) has a much better look and handle design, but cost a fortune (RRP US$ 887.76) to replace all of my 72 trays and additional time to screw all the hard drives.
On the other hand, compared to most HP and DELL tray, most of Supermicro drive tray has much large hole, allow more airflow to go through the hard drive. Also, all of them includes plastic dummy hard drive, which allows airflow to go through the hard drive and preventing airflow bypass from the empty drive bay.
Lucky the chassis includes an internal drive tray (MCP-220-84603-0N), it is expensive (cost US$ 29.99 brand new), and very hard to find in China.
Power Supply
Chassis support redundant power supply, but only one 900W power supply (PWS-902-1R) come with the package, it’s load and not 80 Plus certified. All of my chassis come with this type of PSU, but I replace with much quieter 920W PSU with SQ (PWS-920P-SQ).


On Rack
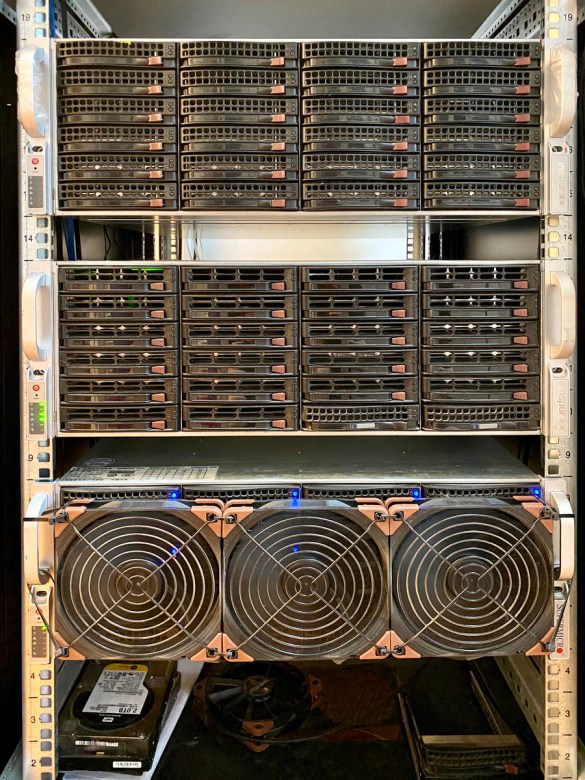
Installed with 4U Rail Kit (MCP-290-00057-0N) on the rack. The Supermicro rail looks thin, but very well made, easy to install (no tool or stupid cage nuts required). It’s a ball-bearing rail, I can easily pull a full load server all the way out.

Finally, looks great with other servers. I left 1U between server for better cooling, and avoid a collision when I pull out the server.
Title Photo by Magnus Engø on Unsplash
Supermicro SC846 is a great chassis for homelab users, which offering 24 3.5inch hard drive bay with varieties of backplanes. Most users buy second-hand chassis and want to change backplane because it doesn’t fit their needs. I list all backplanes for SC846 until April 2020 and also my recommendations for the different use cases.

Title Photo by Magnus Engø on Unsplash
Group your equipment together, make sure you can access most of your equipment at the same location at the same time. This will reduce lots of effort when tracing an unknown device issue – you don’t have to run between different places.
You can have your equipment group in two or three locations, but you should not put them everywhere at home, except some special network device such as WiFi access point, or communication device, for example, VoIP phone.
The system should be located on a fixed location at home. Depends on the country you located, house structure you stay and types of equipment you have, the location of your home lab can be different.
Choose good locations is one of the most challenge part of your home lab setup. there are many variables have to consider
First of all, there must be a power source close to your homelab device. it is not a good idea of running long extension power cable without a certified electrician. Using extension power cable with high power equipment can be a fire hazard with, and not secured cable can cause accidents.
Provide dedicated circuit and power lets for your equipment if possible. Do not share a circuit with other high power electrical appliances such as air-conditioning, electrical oven or electrical heater. You don’t want your server lost power because of an overcurrent or short circuit in a different room far from your homelab.
Make sure you have enough existing network cable access to your homelab location. You should also have a backup line for your core network in case of a cable problem.
Evaluate your cable for future upgrade, for example, it will be very difficult to run a 10G network on a CAT5e cable. Consider the difference between a copper-based network or a fibre-based network, and which type of network your device supports.
Many enterprise equipments are designed for running inside a server room or datacenter, in most of the cases server noise is not a concern. Several new server models from HP and DELL is much quieter than before, but running noise may sill too loud for most of the people, especially at night.
Homelab equipment consumes electric and produces heat. Now new server cloud operates under higher environment temperature such as 28 Celsius, but some parts such as hard-drive may lose service life.
Heat can also cause server fan running at very high speed, and cause extra noise. We are human, we can not work in an extremely hot environment.
You should keep enough workspace for your homelab and make sure all equipment is easy to access. This should including enough spaces when not maintain your server and when you are moving your equipment.
Most servers are flat and long, they may difficult to go through narrow corner or doors. A full hight server cabinet can easily over 2 meter high, which makes them not fit in some basement or attic.
Servers are generally made by steal, which means they are heavy, very heavy. An empty 2U DELL or HP rack server can be easily over 20+ kg without any hard drive installed. Fully loaded 4U storage boxes can be heavy as 50+ kg, and you need at least 2 person to move those boxes, or using lift equipment. so make sure you still have space for your friends and carry equipment for your server.
A fully loaded 42U server cabinet can be heavy as 2000 kg, with footage less than 2 square meters. make sure your floor support a heavy load, and not make holes on it.
There are some commonplace for your homelab. they have different pros and cons.
Pros: This could be the best place for your home lab.
Cons: This could be the most expensive plan.
Pros:
Cons:
Pros:
Cons:
Pros:
Cons:
Pros:
Cons:
Pros:
Cons:
Pros:
Cons:
You can have your equipment in different place of your home, for example, I have my network gear in a small network cabinet just above the front door and my main servers located in a larger cabinet in my study room.
Be in a fixed location not means you can not move them. You can have your server sets on a cabinet with wheels, or have a cluster of Raspberry Pi on a box you can move from one place to another. but your homelab equipment should not like your laptop or iPad that you can take where you goes to.
Use server cabinet or rack can significantly make your homelab clean and make your device easily accessible because most of the industry equipment is design for rack mount.
But use or not use a server cabinet can depend on type and quantity of the equipment you have. For user with several heavy server and equipment, use standard server cabinet cloud be a better decision. The smaller size network rack is also a good choice for network device only user.

This is the roadmap of my on going home lab project. Including hardware installation, modification; and platform level software setup such as OS , iSCSI setup and configuration…
